Author: crogers (Page 2 of 3)

Bread Making in the Classroom: Focusing on the Math and the Science

Source: boredteachers.com

My bread-making journey over the past two months has given me plenty of time to reflect and make connections to how bread can be applied to a variety of curricular content and competencies in the classroom:

From the BC Curriculum:

  • Core Competencies:
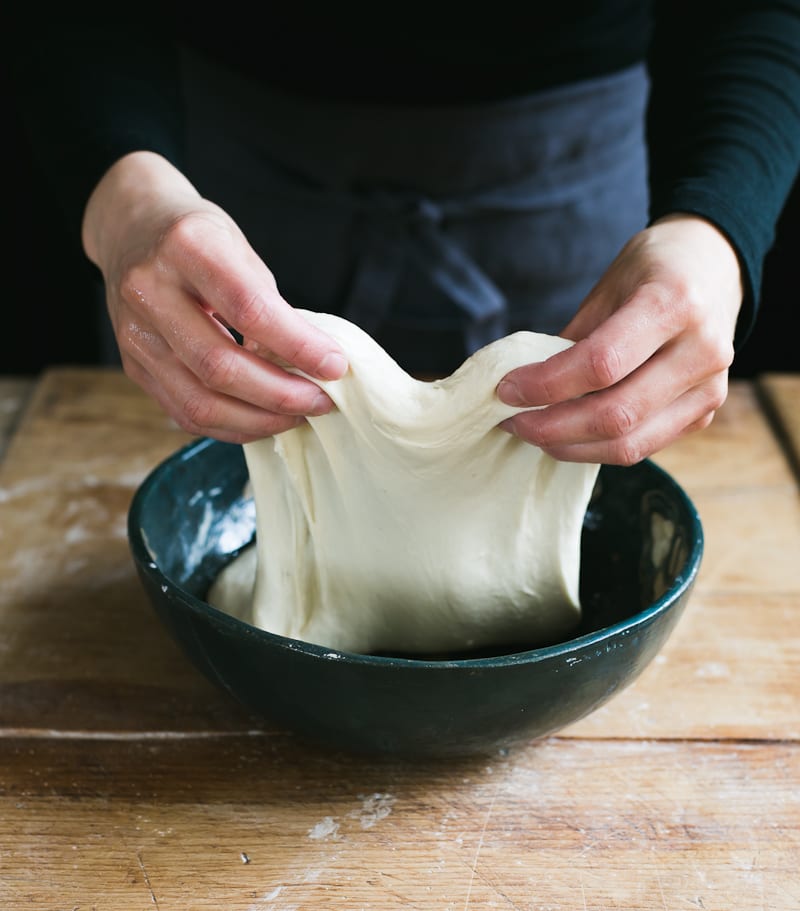
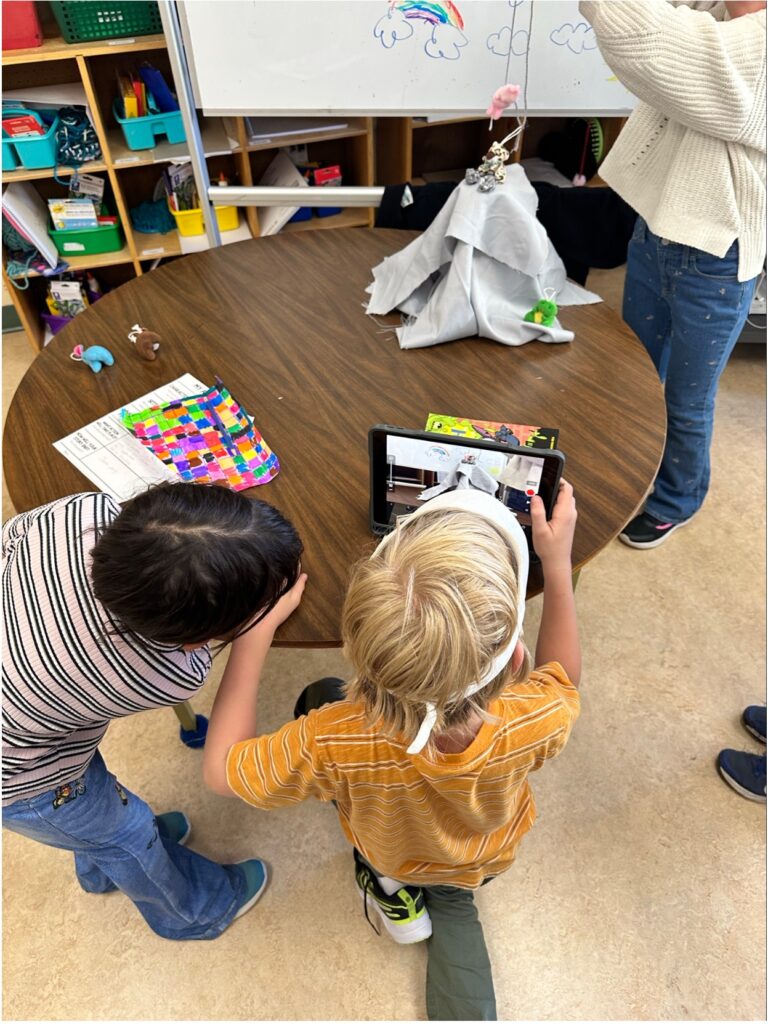
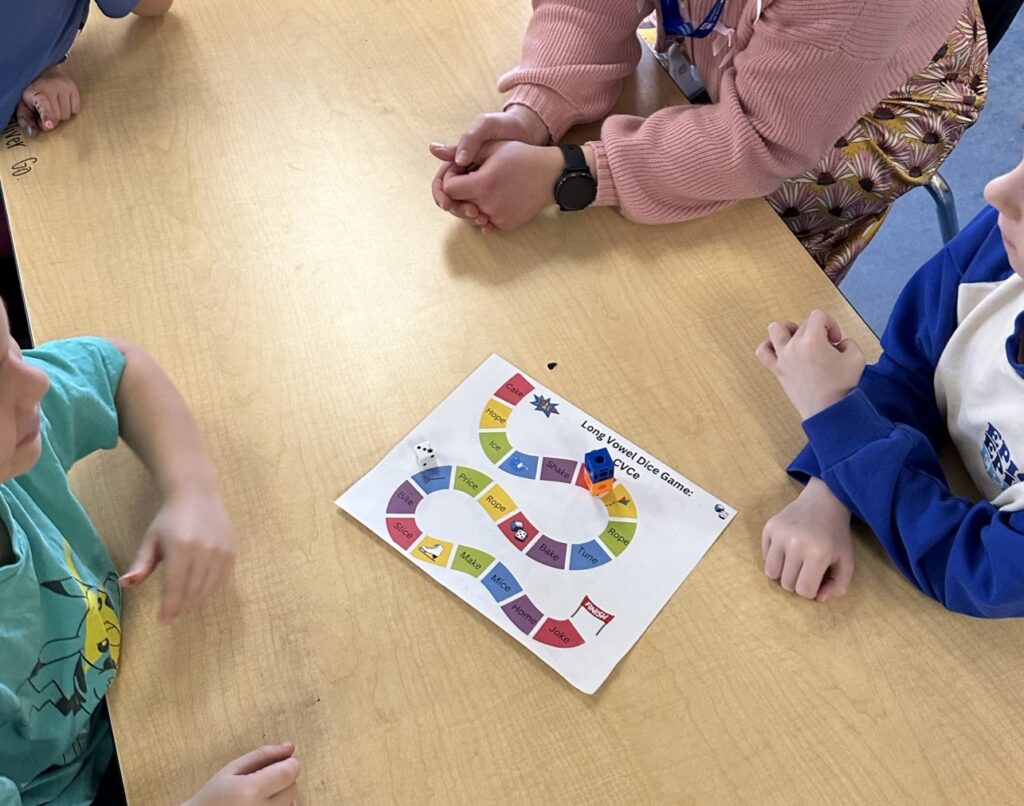
    • Communication: students will work together in groups to gather ingredients, mix, knead, fold, and bake their bread. They will reflect on their shared experience afterwards.
    • Critical and Creative Thinking: Experimenting with ingredients, solving problems during the process.
    • Personal and Social Responsibility: Understanding food sources, sustainability, and cultural respect.
  • Science (Grade 4)
    • Big Idea: Matter has mass, takes up space, and can change when it is heated or cooled.
    • Curricular Competencies: predict outcomes based on prior knowledge, collect data based off of observations, compare results to predictions, and communicate findings using data tables, charts, reflections, and drawings.
  • Math (Grade 4)
    • Big Idea: Fractions and decimals are types of numbers that can represent quantities.
    • Curricular Competencies:
      • Model mathematics in contextualized experiences
      • Develop, demonstrate, and apply mathematical understanding through play, inquiry, and problem solving
      • Use mathematical vocabulary and language to contribute to mathematical discussions

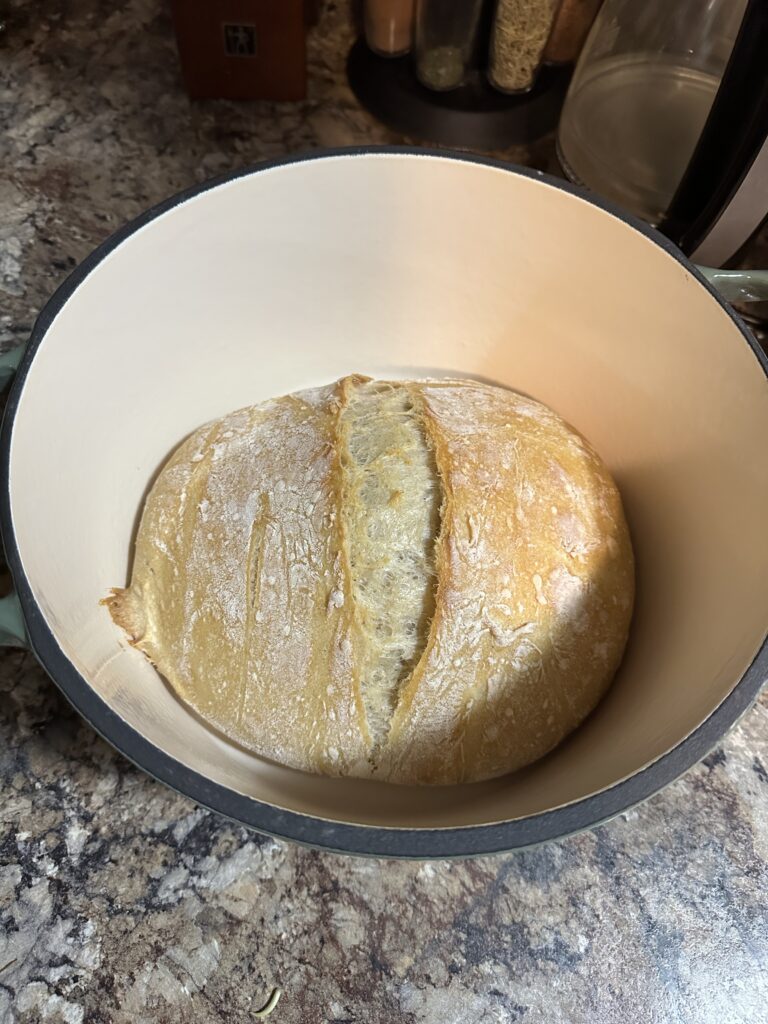
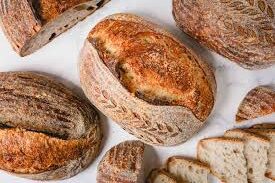
Bread making as a class project can be incorporated to build off of prior knowledge and to cement learning in an engaging and hands-on way. Learning about the science behind the process of bread making can help students develop a newfound fascination with everyday items, and how energy sources like heat can change matter. My hope is that experiences like this encourage them to formulate more I wonder statements about the world we live in.

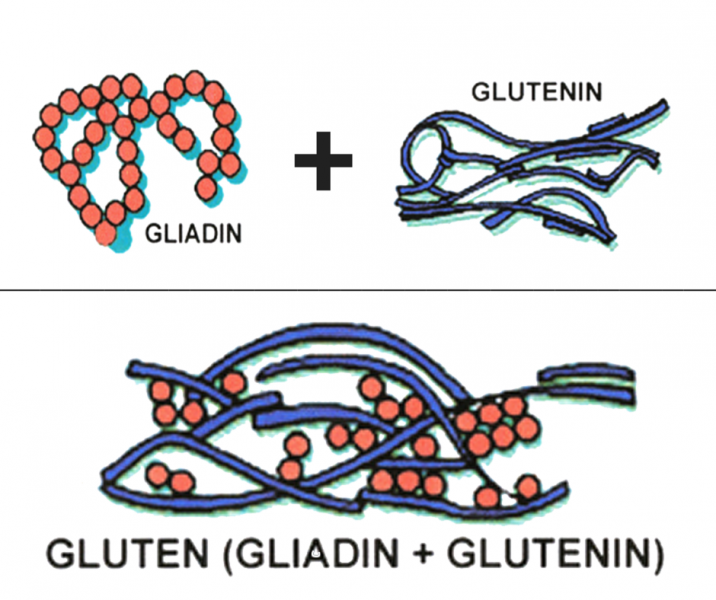
Here is a great introductory video on Why Bread Has Holes in it.

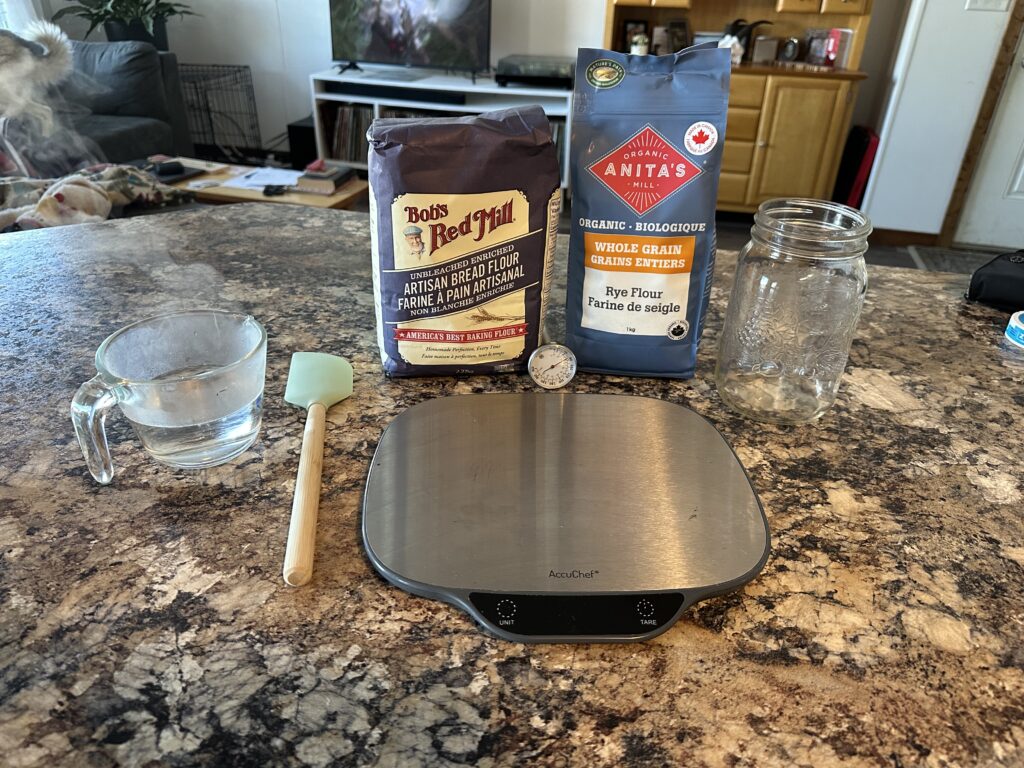
While making bread, students will practice their ability to measure and apply their mathematical thinking, specifically their understanding of fractions and ratios. When looking at a recipe, we may want to double it or reduce the quantities by half. This can be a great way to have students practice their mental math with fractions in an interactive way. You can also have students practice weighing their ingredients, which can help show students how different substances have different masses, even if they have the same volume!

The wonderful thing about bread is you can scale the complexity depending on the age level you are working with. Here is a simple white bread recipe that can be used with a bread machine. For older grades, you can use recipes that require multiple rises, proofing, and different flour compositions. This can be useful for analyzing cause and effect. For example, students could decide what variable they would like to measure by baking two loaves. One loaf would follow the recipe exactly, and the other, for example, might omit the proofing stage. What happens?

For my next blog post, I will continue to explore the incorporation of bread making in the classroom, but with a focus on Social Studies and Art.

Hands-on Learning: My First Loaf of Sourdough

Making sourdough is just as much of an art as it is science. During my search to find a recipe, I discovered that there are many different methods. While all are very similar in their timeline and methodology, each baker adds their own unique touch. Whether it is folding, hydration content, or the type of flour used, every sourdough loaf is the result of both creativity and experimentation.

I was given a sourdough recipe by a colleague of mine who is also in the EKTEP program. I began by removing my starter from the fridge on Sunday morning to ‘wake up’ and feed. Placing sourdough in the fridge is useful for those who do not bake on a daily basis. When I first started feeding my starter, I had it out on the counter and was feeding/discarding every day. I began to notice just how much was being wasted (discard is a necessary evil of sourdough starter) and began looking for alternative storage options that better suited my busy schedule. Storing your starter in the fridge significantly slows the fermentation process, which allows you to reduce feeding to a weekly basis instead of daily. This has also been shown to give the bread a more complex flavour!

After removing the starter from the fridge to ‘wake up’ (warmer temperatures affect rate of fermentation), I fed it fresh flour and warm water. I found the most challenging aspect of bread-making to be time management. For example, after feeding your starter for making bread, you must wait 4-7 hours for it to double in size. Then you combine more flour, salt, and water and must let it rest for another 2-3 hours! The bubbles seen in your starter is where the magic happens- these are pockets of gases produced by the fermentation, giving sourdough its notable flavour.

Stretching and Folding

Source: Theclevercarrot.com

The recipe I used called to stretch and fold the dough every 30 minutes for the next two hours after the first rise. Stretching and folding the dough is done to strengthen the dough and give it an airy texture. If you read my previous blog post on the science of bread making, you’ll remember that this is similar to the act of kneading the dough, as it helps straighten out proteins in order for them to interact with each other better.

Cookware

In order to get a golden flaky crust, you need to bake your sourdough in a dutch oven. This is because the lid traps the steam, allowing the loaf to bake thoroughly and evenly. Dutch ovens are also preferred for bread making, as they can withstand high temperatures.

I was gifted a set of enamelled dutch oven pots that are sold at Costco. They are super easy to clean and a beautiful colour!

Learning through doing: My takeaways

Learning happens outside of your comfort zone

I am susceptible to paralysis through analysis, meaning I find it difficult to start a project if I do not feel completely confident in what I am doing. Starting my first loaf of sourdough was intimidating for this very reason! But, I knew that the only way I could determine my skill set and areas needed in growth was to start. This makes me think about instances of timid trepidation with elementary students in the classroom. When students do not have the confidence and the sense of security to feel safe to fail at something, they may avoid going outside of their comfort zone. That is why it is so important to show students it is okay to make mistakes (and that you do too).

Patience is a virtue

Making a loaf of sourdough involves a lot of waiting. I ended up doing a cold ferment for my final rise (a 8-10 hour rise in the fridge), bringing my total time from start to finish to be just under 24 hours. I opted for the cold ferment because otherwise I would be up well past midnight of the first day. This ended up working well in my favour, as cold ferments also influence the complexity of your bread’s flavour. A win-win: I get to sleep, and I have delicious bread to look forward to! I think projects like bread making can be useful for getting students used to delayed gratification. In fact, studies have shown that children who are more used to a delay in gratification (as opposed to immediate rewards) tended to be more successful in life. This is because they developed higher levels of persistence and self-control; traits that are essential for overcoming challenge and adversity.

Unconsciously Expanding your Knowledge

I think learning is the most fun when you don’t even know that you’re learning. An experiment conducted at Harvard University asked students to report in what contexts they feel like they learn the most: lecture-style methods or activity-based approaches. Most students reported that they felt they learned more in traditional lecture settings. Interestingly enough when tested, students in the activity-based approach did far better, suggesting that they learned and retained more information even if they did not realize it. The researchers theorized that students may feel like they learn more in a lecture as there is less effort on their end. Hands-on approaches require more cognitive effort, which may force students to leave comfortability.

Breaking Bread: Exploring the Chemistry that Makes Your Bread Rise

The ingredients behind a fluffy loaf of bread are simple: flour, water, yeast, and sugar. But with a closer look, we see that there is more to these ingredients than initially meets the eye. If you have made bread before, you know that when these four ingredients are combined, the dough doubles in size. This reaction has always fascinated me, which made me wonder what was going on at a molecular level.

The Flour

There are many different types of flour. What makes each of them unique is their protein content. Bread flours will have a higher protein percentage, ranging around 12-14%, whereas all-purpose flours tend to be in the 10-11% range. So what does this mean, exactly? The more protein there is, the higher the rise. It will also add to the texture of the final product, making it more chewy. These proteins, specifically glutenins and gliadins, are what create gluten.

Source: Kansas Wheat Commission

Adding Water

When we add water to our flour, the gliadin and glutenin proteins line up with one another to create stronger bonds and a larger network of gluten. I found the below video helped me to understand this process visually. When we knead the dough, it helps straighten out these proteins in order for them to interact with each other better.

Yeast: What is it?

The word yeast comes from old-English, where the root ‘yes’ means “to boil” or “rise”. Yeast is a single-celled fungus that has been on Earth for hundreds of millions of years. Depending on the type (there are currently more than 1500 types of yeast identified today), yeast can create alcohol by converting carbohydrates and CO2 when left to ferment (sugar is partially responsible for this process). Yeast in bread dough converts the sugars into CO2, giving us air pockets in fluffy bread.

Before commercial yeast was introduced, bakers would obtain this culture from the town’s brewer, who would scrape off the ‘barm’ for the baker to use as a leavening agent in their breads. This barm was essentially a foamy yeast substance that would float to the top of their batch of beer during the fermentation process. There are also a wide variety of wild yeasts in the air we breathe, which is how sourdough starter works!

Into the Oven

Once you have allowed ample time for the yeast to ferment and the dough to rise, it is time to bake your loaf. In the oven, the carbon dioxide and sulphates are cooked off, leaving behind their footprints that give bread its classic airy texture. Through my research, I learned that bread will begin to go stale not due to a loss in moisture, but due to the crystallization of the starch in the bread. This indicates that if you plan to store your bread in the fridge, this will only exacerbate your problem! The best way to mitigate this process is to store homemade bread in a sealable ziplock bag at room temperature. In our house, we don’t have to worry about this too much, as we tend to eat all of it before this happens!

Stop-Motion In-Situ: A Gibb’s Reflection

Source: vfxvoice.com

This week, our class had the amazing opportunity to work with students in a local elementary school with stop-motion films. I think there were many takeaways, both for the grade 3s as well as the student teachers! For this week’s reflection, I am choosing to do a Gibb’s Reflective Cycle to write about my experience.

Description

Our group of mentor teachers arrived at the elementary school just as lunch and recess time was wrapping up for the students. Walking into the school, we could hear excited chatter and laughter coming from behind each of the classroom doors, including our grade 3 In-situ room. We had been advised by our teacher that their class has a substitute for the day, but the kids are nonetheless excited for what is to come. Just as we have been warned by teachers from all walks of life, things never seem to go to plan. You just have to roll with the punches!

As we entered the classroom, you could tell the students were full of energy after spending their break playing out on the playground. The room was quite noisy, but the teacher was able to quickly regain their attention while she took attendance.

Once we were introduced and the classroom teacher gave a brief overview of the students’ next steps, we broke into groups to begin our stop-motion filming project. We began by brainstorming what we wanted our film to be about. We used a template (pictured below) to help the students identify and determine key parts of their story.

Once we had completed our template we began working on props and filming. The group of four worked well together and seemed to distribute work fairly evenly.

Feelings

When first walking in to the classroom, I must admit I felt a bit overstimulated. The room was quite noisy and many of the students were having side conversations while the substitute was trying to provide instruction. When we first split off into our group, the students were having a hard time remembering to listen when others were speaking. I asked them to use quiet hands when they had thoughts or ideas relating to the project which seemed to help a lot. Once we finished our template, the students seemed to naturally assume responsibility over the creation of props and setting up the filming. This was lovely to see! After filming and seeing our final creation for the first time, it made me happy to see how excited the students were to see what they had made. You could tell they had a lot of pride!

Evaluation

There were many positive outcomes to this project as well as areas for future improvement. I would have liked to know the background or mini-lesson that was given to the students on stop-motion films prior to our visit to the classroom. In my grade 3 six-week practicum, I remember having to spend quite a bit of time working with the class on the necessary elements of a story. Many seem to forget that there needs to be some sort of resolution (or initial problem that needs to be addressed). I think having a story template like the one pictured above is a great tool for addressing this.

I think the students were very motivated and eager to work on this project. Stop-motion filming gives students lots of creative freedom- it is one of those lessons where learning may not feel like learning because we are having so much fun! Whether they knew it or not, we covered the following from the BC Curriculum for Grade 3:

  • English Language Arts
  • ADST
    • Generate ideas from their experiences and interests
    • Use trial and error to make changes, solve problems, or incorporate new ideas from self or others
    • Develop their skills and add new ones through play and collaborative work

Analysis

I plan to use this project in my future classroom. For next time, I intend to assign roles to students (or ask them to assign their own roles, depending on the age). In our group, we had one student who had a difficult time sharing his own ideas. I wanted to ensure his thoughts and ideas were implemented to I assigned him the role of ‘director’. I told him to direct his classmates, tell them where to move the characters and props. It was wonderful to see his confidence grow in just a short hour!

I think providing roles to students gives them a sense of purpose and responsibility. It may also be easier for some students to approach a multi-faceted project like Stop-Motion films when its components are broken down into chunks. This also ensures every student contributes to the film and they get a say in the final creation. While the ability to delegate and distribute work evenly amongst colleagues, assigning roles for group projects can save time and energy for both the student and teacher.

Conclusion

This in-situ was all-in-all a great experience full of hands-on active learning that was so much fun. Stop-Motion Filming in the elementary classroom is a great way to incorporate technology while also allowing students to collaborate and create something they are proud of. I could see this activity being made into a unit plan, where groups are tasked with writing out a detailed script and story board for their film. This can be adapted for multiple age groups, ranging from grade 3 up to grade 12.

Action Plan

For my future classroom, I intend to incorporate this activity into a story-telling unit. Last year during my six-week practicum, I created a unit plan on different ways to tell and share a story. We looked at wordless picture books and silent films, picture books, short stories, and listened to a traditional oral story from a member of the Ktunaxa nation. I think including stop-motion films would be a great way to expand student’s learning by allowing them to create their own visuals in a hands-on way. Through stop-motion, they could explore storytelling structure, sequencing, and creativity while also practicing collaboration, problem-solving, and digital literacy skills.

Weekly Reflection 2: Stop-Motion Animation

Source: adobe.com

In this week’s class, we explored the world of creating stop-motion animation films. Stop-motion films utilize a technique of taking hundreds (or thousands) of photos while making small changes to figures in the scene to depict movement. Once the pictures are stringed together chronologically, the figures appear to move! I remember making flip books in elementary school and being amazing by my creation of a ball bouncing across the pages. I think stop-motion films can take this wonder to an entirely different level.

Stop-Motion Filmmaking in the Classroom

There are a number of different cross-curricular connections that can be made for stop-motion filmmaking. Here are a few connections I made to the curricular competencies found for grade 5:

  • ADST (Applied Design Skills and Technology)
    • Students will design, ideate, prototype, test, and make a stop-motion film.
    • Improving their digital literacy (applied technologies) by using stop-motion applications and devices.
  • Arts
    • Create artistic works collaboratively and as an individual using ideas inspired by imagination, inquiry, experimentation, and purposeful play
    • Adapt learned skills, understandings, and processes for use in new contexts and for different purposes and audiences
  • English Language Arts

While researching this subject, I found a great comprehensive guide to planning and implementing a stop-motion project in the elementary classroom. Alecia Kaczmarek provides a how-to for getting started, how to introduce the topic, steps for students to follow, and worksheets to help them draft a script and plan their scene.

During our class, we created stop-motion films using the mobile app ‘Stop Motion Studio’. This app was very user friendly, making it a great option for student projects. Here is our creation:

I am looking forward to implementing this project in my future classroom. It is not only a great way for students to learn how to create a stop-motion film, but also a way for students to show what they have learned. For example, if you are doing a unit on Shakespeare, students can recreate a famous scene of their choosing. The possibilities are endless!

Weekly Reflection 1: High Tech High

This week we watched a short documentary film titled ‘Most Likely to Succeed’, which explored a progressive and innovative new way of teaching at a school called High Tech High. Located in San Diego, California, High Tech High is a school where there are no standardized tests, no traditional homework, and no worksheets. Teachers here are given the discretional freedom to teach what they want and how they want. The lack of worksheets and tests made some parents feel nervous – “how do they know what information my child is retaining?” one parent had asked. Which, rightly so. As a parent, you should be invested in your child’s education, and generally the goal is to ensure they are prepared to live an independent and fulfilling adult life. “I just want her to be happy” the same parent remarks. 

   One of my key takeaways from the film is that students learn best when they have choice, autonomy, and the ability to use their hands to create things. Instead of a test to pass the class, students were tasked with creating and designing a project that they would present to their community at the end of the school year. It was inspiring to see the amount of work the students put into their creations. One group of students designed an elaborate wheel and cog system showing the multiple interlaying reasons behind the rise and fall of a civilization. One part of the project was not working in the way the student intended it to, leading to many late nights. “It’s challenging not to step in and help them find the answer”, their social studies teacher remarked. 

Wheel and cog project visualizing the rise and fall of civilizations. Source: hightechhigh.org

Making Sourdough Bread

For many of us, bread is a major staple food in our everyday diet. From toast at breakfast, the crust of our pizza, to the rolls we share at dinner time, bread is everywhere and universally loved. This passion spans back thousands of years, starting with flatbreads that were cooked in burning embers, to fluffy hearty breads baked in specialized ovens.

I began my inquiry project with a goal to learn more about the world of bread making. Specifically, the art of sourdough starters. As I began my research, I started to notice the fascinating blend of science, history, and culture wrapped up in something as seemingly simple as flour and water. I began my sourdough starter with my digital food scale, thermometer, rye flour, and all purpose flour. During this initital process, I couldn’t help wondering how, without any technology or knowledge about microbiology, did ancient civilizations figure out the complex process of fermentation?

When making sourdough at home today, you will follow a precise step-by-step process of mixing varying levels of Rye flour, unbleached All-Purpose flour, and water heated to exactly 85°F. Your starter will need to be ‘fed’ at least once every 24 hours, meaning some of your mixture must be removed and new flour and water must be added.

I began my journey of homemade sourdough bread by watching Joshua Weismann’s ‘Ultimate Sourdough Starter Guide‘ on Youtube.

I found Joshua’s video very informative and easy to follow, especially for a beginning bread maker like me! He even includes a detailed downloadable PDF that provides specific instructions for beginning your sourdough starter.

After watching the tutorial video a couple hundred times, I was ready to begin my bread-making journey. Pictured here is my digital food scale, a thermometer, a clean glass jar, unbleached All Purpose flour, dark Rye flour, a spatula, and water. Day 1 of my starter feeding calls for the following:

  • 100 g rye flour
  • 150 g water at 85°F

As recommended by Josh in his video, I record the weight of my empty mason jar. This will be needed for later when I routinely remove mature starter and add fresh ingredients. During my recording and careful weighing of the exact amount of flour, I am thinking about how this can be applied to many different areas of the BC Curriculum across multiple different grade levels. Here are a few curricular connections for mathematics that can be made:

  • Mathematics, grade 3: units of measurement (linear, mass, and capacity)
  • Mathematics, grade 6: Ratios, volume and capacity

For my next blog post, I will focus on the rich history of sourdough bread making. Throughout my free inquiry I also intend to provide weekly updates on my own bread-making journey!

Introduction: The Science & History of Bread Making

For this semester’s Free Inquiry project, I will be exploring various virtual resources to learn how to make different types of bread. I’ve made some basic breads in past years, but never have made anything that requires more than a few hours of work. For my Free Inquiry Project, I wanted something I could apply to a personal interest of mine as well as being cross-curricular (science, history, and ADST).

Introduction

I chose bread-making for my project because its history and chemical processes have always fascinated me. In the early stages of my research I have come to discover that bread has played a much more important role in human history and civilization than I had initially thought.

The earliest forms of bread date back more than 14,000 years ago in the country of Jordan, where an ancient stone fireplace was discovered with remnants of bread crumbs. During this time period (and dating back over 100,000 years), people would grind cereal grains and mix it with water to form a paste. It is still unclear how exactly this paste was further prepared, but researchers believe that at some point this paste was turned into the world’s first flatbread (Alfaro, 2020).

Ancient Egypt Alive

Between 14,000 and 10,000 years ago, it is believed that the discovery of yeast was discovered accidentally, likely when someone left out the water-flour substance for enough time to let it ferment and form small gas bubbles. Thus, the world’s first sourdough starter was born.

For my project, I plan to research the history, science, and methodology of bread-making to be able to create my own loaves at home, and eventually in the classroom with my future students. Bread-making is great for many different grade levels, and can be applied to multiple subject areas:

  • Science: Bread-making is great for many different grade levels, as it helps show certain chemical processes, such as the role of yeast in fermentation and the production of CO2.
  • Mathematics: Measurement, ratios, fractions, and percentages.
  • History: A food source that has been a staple for thousands of years in many different countries and civilizations.
  • Geography & Social Studies: Explore how regional differences influence types of bread made within certain cultures.

Through my inquiries, I will be able to explore a cross-curricular project suitable for many different grade levels. To stay organized while researching, writing, baking, and reflecting on my project, I will use a Trello board, which is a free online resource (pictured below) to help you organize your daily and weekly tasks.

Sources

Alfaro, D. (2020, March 11). A definitive timeline of bread. The Spruce Eats.

https://www.thespruceeats.com/bread-history-timeline-4783245 

Egyptian Hieroglyphics photo from https://ancientegyptalive.com/2022/06/01/bread-in-ancient-egypt/

Trello Board https://trello.com/b/ybHRqbFx/edci-336-free-inquiry-project

Classroom Takeaways- Part III

Grade 2 Literacy Stations

The Big Idea: Playing with language helps us discover how language works

Curricular Competency: Use phonics, word patterns, and sight words to spell words.

Content: Phonemic awareness, letter-sound relationships, and strategies for reading unfamiliar words

Long Vowel, Short Vowel Dice Game

For my literacy station with the grade 2 Gordon Terrace Elementary class, I created a dice game for students to practice identifying, saying, and spelling words with the CVCe structure. Pictured on the left was one of the two variations I created. In this game, students would take turns rolling the dice which would indicate the number of spaces they would travel. Whatever word they would land on they would need to say or sound out. Before we began, I reminded students about the ‘CVCe’ rule, where the E at the end of a word will make the vowel say its name. I told the students that this is also referred to as a long vowel! For spaces that had the pictures, students would say the word and as a challenge, try to spell it.

The second variation of the game was created as an extension for students when they played the first game and had successfully identified the CVCe word pattern by sounding out and spelling words correctly with their peer. In the second game, I asked students what was different about the board, to which they responded that there were no words! On this board, students will identify each of the pictures they see by saying its name and then trying to spell it. But be careful! This game board has both short and long vowels. I asked students to remind me how they can identify which is which. Once students could successfully articulate how to identify what a long vowel sounds like, they were ready to play.

Grade 3 Reader’s Theatre

Reader’s Theatre is a fun and collaborative way for both thriving and striving readers to practicing reading aloud to build fluency and practice expression. Many short stories adapted for elementary reader’s theatre have a variety of parts that are applicable for readers of all levels (Bright, 2021, p. 80). Pictured below are the four books we read together with a grade 3 class at Gordon Terrace Elementary School.

Connection to the BC Curriculum

The Big Idea: Using language in creative and playful ways helps
us understand how language works.

Curricular Competency: Use developmentally appropriate reading, listening, and viewing strategies to make meaning

Content: Reading strategies, oral language strategies, and features of oral language

For this Reader’s Theatre, our group read the classic Little Red Riding Hood, a story about a young girl who goes to visit her sick grandmother, but is met instead with the big bad wolf. Our group of third graders were all eager and ready to take on challenging roles and explore how to tie in elements of drama and theatre into their rendition. During our practice session, we encouraged the students to move around their space and act out what their characters were doing. For example, in the story when the grandmother went to hide from the wolf, the young actress said her line while crouching and making herself smaller. Little Red Riding Hood made use of the Wolf’s mask during our reading session by pointing to each body part when saying “What big ears you have!”

On the day of our presentations, the students had one more chance to practice projecting their voice, speaking with expression, and adding a little bit of movement into their reading. Students once again were engaged and ready to share their story to the class.

Societal, Cultural, and Gender Issues in Literacy

Banning books has subtle irony in the same way attempting to extinguish a fire by fanning the flames makes it burn brighter. Those in power attempt to censor messages or ideologies that go against their teachings and by doing so, make the book and its message increasingly popular. Take for example, 1984 by George Orwell. Despite it being written over 70 years ago, the novel topped Amazon’s best-selling books charts in 2017, shortly after Donald Trump was elected President of the United States (Schwarz, 2017).

While the setting in the book was fictional, its message held a disturbing truth about the society we live in. So, why had it become one of the most widely banned books in North America? Many sources suggest the book was taken off the shelves due to sexually explicit content, but I believe there are more sinister reasons for its removal. According to The Perplexing History of 13 Banned Books in America, a prominent and populated county in Florida argued the book should be banned due to its “pro-communism” messages (McConnell, Peart, & Noss, 2022). Ironically, the concerns from authorities and community members about its political messages are the same concerns the book outlines. Based on Nazi Germany’s totalitarianism, Orwell illustrates the consequences of an over-arching government which maintains hyper-vigilant control over the masses.

In our Reading Instructional Principles and Strategies class, we explored this issue and its effect on the elementary classroom. Written by Ian and Sarah Hoffman, Jacob’s Missing Book tells a story about a young boy looking for his favourite book in the school library (And Tango Makes Three by Justin Richardson), but it is gone. Maybe someone else is reading it? When he goes to ask the librarian where the book has gone, she tells him it has been removed. Jacob’s favourite book relates to LGTBQ+ rights, and he had attempted to find it to show a friend who has two dads.

Mirrors, Windows, and Sliding Glass Doors

Mirrors, Windows, and Sliding Glass Doors is an analogy described by Rudine Sims Bishop to explain the importance of diversity in books. When we find books that reflect our own identity, our society and culture, or allow us to step into other worlds we gain a deeper understanding of one another. Inclusivity in representation in books is so important for young children. Growing up, we often find ourselves looking for ways to fit in or find what defines us. When children are represented in books and movies, they feel a sense of pride and joy. As someone who comes from a privileged and white background, it can be easy to take this for granted.

Bishop also mentions how books can be sliding glass doors, where we step into a world that is different from our own. I remember the first time I read The Kite Runner by Khaled Hosseini and felt an overwhelming sense of gratitude and appreciation for the part of the world I grew up in, especially as a female. I also found myself deeply moved by the main character’s resilience, struggle with guilt, and redemption.

Resources:

McConnell, K. C., Peart, A., & Noss, K. (2024, September 20). The perplexing history of 13 banned books in America. Explore the Archive. https://explorethearchive.com/history-of-banned-books 

Mirrors, windows and sliding glass doors. Reading Rockets. (n.d.). https://www.readingrockets.org/videos/meet-authors/mirrors-windows-and-sliding-glass-doors 

Schwarz, H. (2017, January 26). Sales are spiking for “1984,” but it has a long history in Politics | cnn politics. CNN. https://www.cnn.com/2017/01/26/politics/politics-of-1984-through-the-years/index.html 

« Older posts Newer posts »